Step 1. A New Helmet.
Friday August the 11th, 2006 was the day I got my Stormtrooper Helmet. A shiny white plastic helmet. Almost as cool as a real durasteel ST helmet.
Since getting an armor is quiet expensive, I got a deal where I could pay for it monthly. Each month getting some parts of my armor. That works fine with me cause, that way, I can afford to pay it, and I can have enough time and not rush into building the whole armor at once. Im not very patient with these kind of things.
Ive heard all kindof stories about ppl being too impatient and excited, and therefore comiting several mistakes when putting toguether the armor. Specially the helmet. So, I was very thankfull to get my helmet all in pre-esambled and with the decals already on. But that didnt meant it was anywhere near finished. No.
So, I firstly studied the parts, how it worked toguether and how it was build. Evaluating what modifications to make and which ones dont.
Just before begin working on my helmet, I got a few basic tools: hot glue and hot glue gun, scissors, cutter knife, hand drill, spray paint, and some other stuff.
First modification, I decide to hot glue all the helmet parts toguether. Good call I think, cause now the helmet feels a lot more solid and doesnt feel like a plastic toy anymore.
Then, to give it a more "realistic" look, I spray painted the interior in black. It gave the helmet a really cool look and now it feels like if it was made of some real armored material. To do it, I masked the lenses, removed the black rubber rim and masked it from the interior to the exterior, this to prevent the outer side of the helmet to be painted. Unfortunately, I dont have pictures of any of these steps, but I do have some picts of the finished look.
After painting it, and letting it dry for several hours, I decided to get some metalic screen, and start working on the frown vents. In this part of the process, my girlfriend joined me. I must say that its for me a great joy and also it makes the whole thing more exciting, that she supports me, helps me and most important of all, is happy for me to have my armor! She is the BEST!
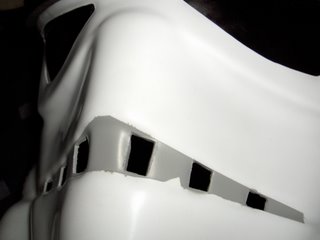
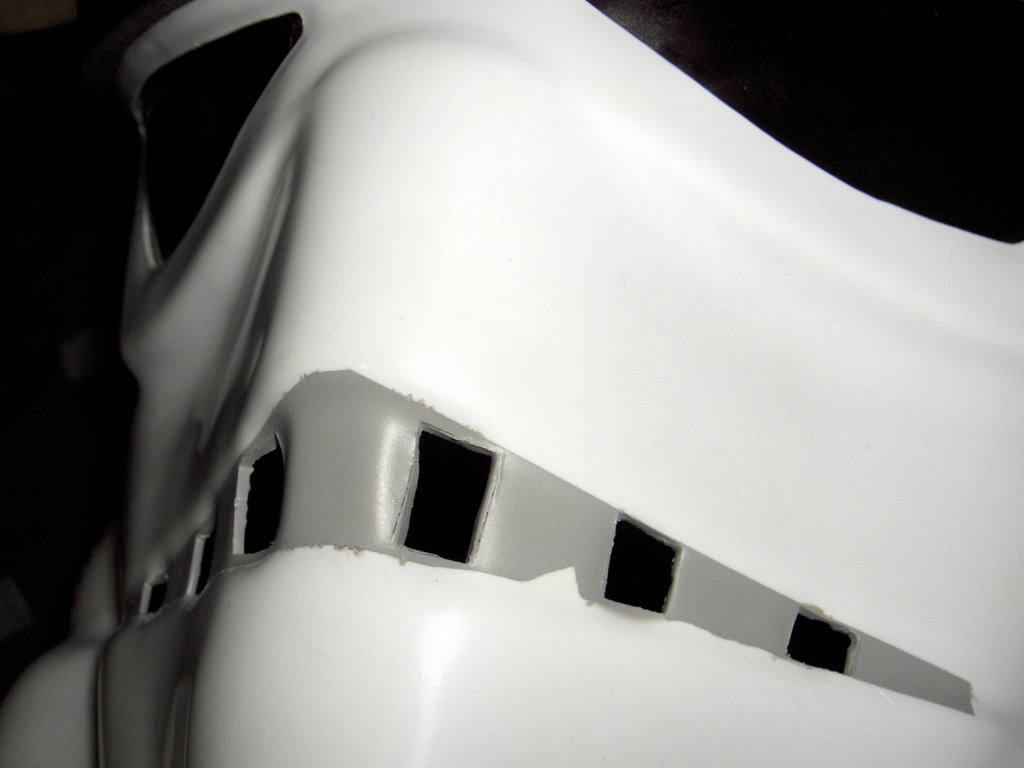
Using my hand drill, I drilled some wholes in the frown, and then using the cutter knife I carved the wholes until they were shaped like squares. Althought it took some time, it was easier than I thoughth it would be. At the end, I had the helmet with all the vents, ready to be painted gray to meet the ANH style.
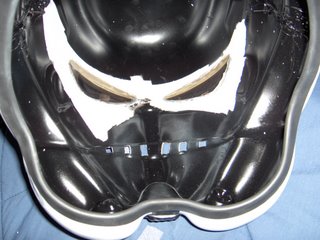
To paint it, I masked the helmet leaving just the area that I was going to paint. Being careful to cover the holes from the inside of the helmet, to prevent any unwanted gray spots on the interior. I dont have pictures of these either, but here is one of the result.

Now, there were 2 main unwanted results here. First of all, the paint color did not match the color of the decals, so I was a bit disapointed about that. Need to paint it again in some darker gray. The second one, is that when removing the tape I used to mask the helmet up, some paint was removed from the helmet surface in the edges, and a big portion of it from the inner part. So, Ill have to paint it all up again.
Here is a picture of the detail of the paintjob.
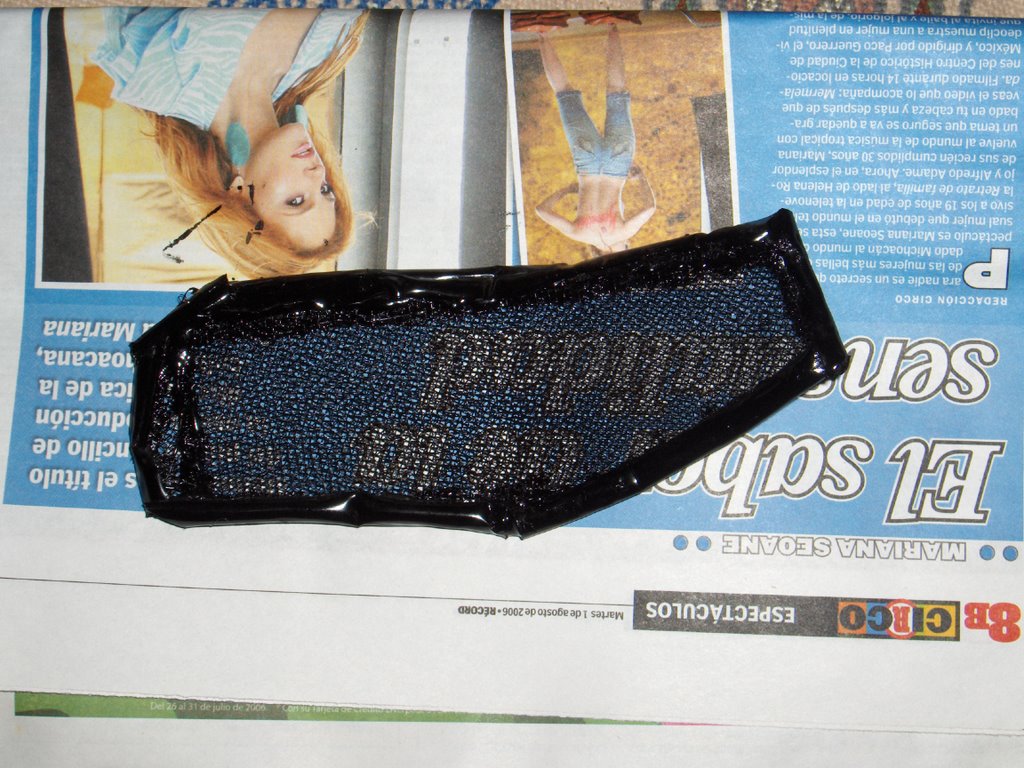
So, once I accepted that I would not be able to work directly in the helmet for a while, I looked forward the screen I would use to place inside the vents.
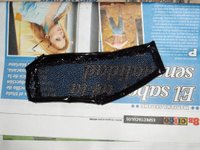
What I did, was cutting three different pieces of screen, being carefull to position them in such way that it was difficult to see through them. And then, proceeded to glue them toguether with hot glue.
A problem I found, was that the edges of the screens had wires that coud harm or scratch my face. I glued plastic straws to the edges and had a softish, round edge for my screen! It worked fine. I then, just painted it black and the piece was ready to be glued in place. Too bad I cant do it for now, not until I have the paint job done right.
Here is a picture of the screen.
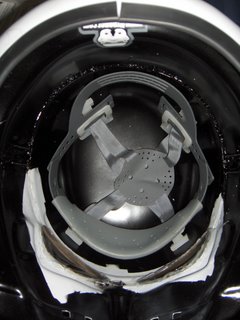
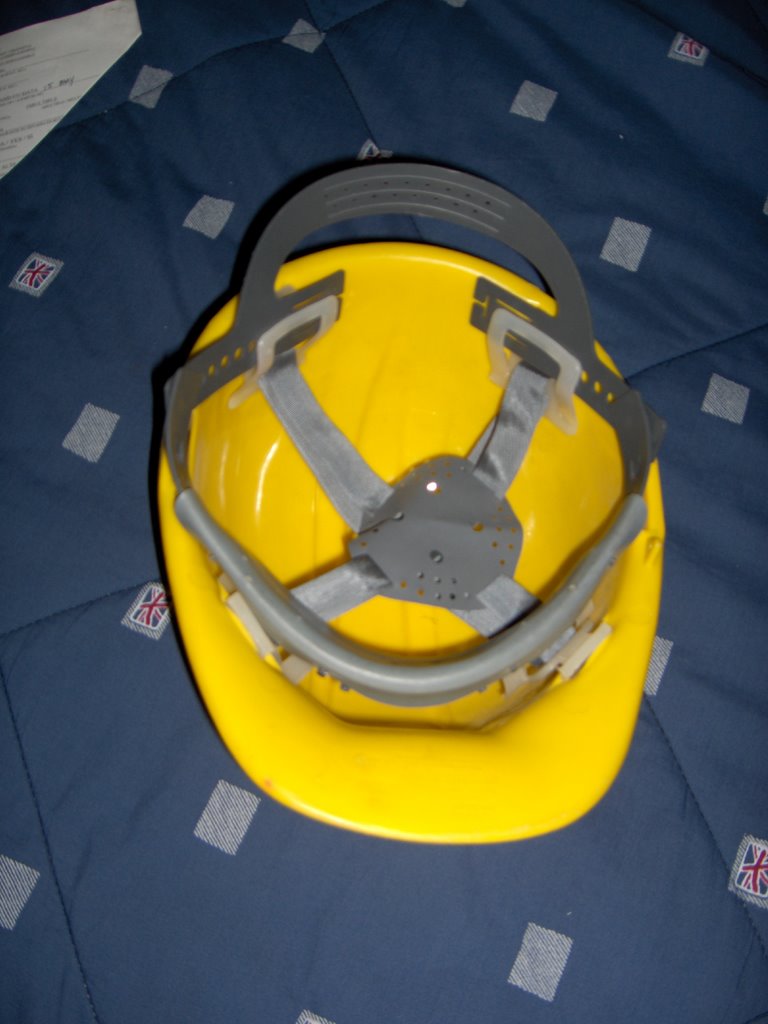
Next, and since I cant do much more until I get the correct gray paint, I just got an old construction helmet and took the liner apart from the hat. I will use it later on to make the right modifications to get a good fit for my head (I have dreadlocks so its not an easy job). Im thinking about fixing it with Velcro or something. Lets see.
Here are pictures of it.

Since getting an armor is quiet expensive, I got a deal where I could pay for it monthly. Each month getting some parts of my armor. That works fine with me cause, that way, I can afford to pay it, and I can have enough time and not rush into building the whole armor at once. Im not very patient with these kind of things.
Ive heard all kindof stories about ppl being too impatient and excited, and therefore comiting several mistakes when putting toguether the armor. Specially the helmet. So, I was very thankfull to get my helmet all in pre-esambled and with the decals already on. But that didnt meant it was anywhere near finished. No.
So, I firstly studied the parts, how it worked toguether and how it was build. Evaluating what modifications to make and which ones dont.
Just before begin working on my helmet, I got a few basic tools: hot glue and hot glue gun, scissors, cutter knife, hand drill, spray paint, and some other stuff.
First modification, I decide to hot glue all the helmet parts toguether. Good call I think, cause now the helmet feels a lot more solid and doesnt feel like a plastic toy anymore.
Then, to give it a more "realistic" look, I spray painted the interior in black. It gave the helmet a really cool look and now it feels like if it was made of some real armored material. To do it, I masked the lenses, removed the black rubber rim and masked it from the interior to the exterior, this to prevent the outer side of the helmet to be painted. Unfortunately, I dont have pictures of any of these steps, but I do have some picts of the finished look.

After painting it, and letting it dry for several hours, I decided to get some metalic screen, and start working on the frown vents. In this part of the process, my girlfriend joined me. I must say that its for me a great joy and also it makes the whole thing more exciting, that she supports me, helps me and most important of all, is happy for me to have my armor! She is the BEST!
Using my hand drill, I drilled some wholes in the frown, and then using the cutter knife I carved the wholes until they were shaped like squares. Althought it took some time, it was easier than I thoughth it would be. At the end, I had the helmet with all the vents, ready to be painted gray to meet the ANH style.
To paint it, I masked the helmet leaving just the area that I was going to paint. Being careful to cover the holes from the inside of the helmet, to prevent any unwanted gray spots on the interior. I dont have pictures of these either, but here is one of the result.

Now, there were 2 main unwanted results here. First of all, the paint color did not match the color of the decals, so I was a bit disapointed about that. Need to paint it again in some darker gray. The second one, is that when removing the tape I used to mask the helmet up, some paint was removed from the helmet surface in the edges, and a big portion of it from the inner part. So, Ill have to paint it all up again.
Here is a picture of the detail of the paintjob.
So, once I accepted that I would not be able to work directly in the helmet for a while, I looked forward the screen I would use to place inside the vents.
What I did, was cutting three different pieces of screen, being carefull to position them in such way that it was difficult to see through them. And then, proceeded to glue them toguether with hot glue.
A problem I found, was that the edges of the screens had wires that coud harm or scratch my face. I glued plastic straws to the edges and had a softish, round edge for my screen! It worked fine. I then, just painted it black and the piece was ready to be glued in place. Too bad I cant do it for now, not until I have the paint job done right.
Here is a picture of the screen.
Next, and since I cant do much more until I get the correct gray paint, I just got an old construction helmet and took the liner apart from the hat. I will use it later on to make the right modifications to get a good fit for my head (I have dreadlocks so its not an easy job). Im thinking about fixing it with Velcro or something. Lets see.
Here are pictures of it.

posted by plasta at 10:34 AM
![]()


0 Comments:
Post a Comment
<< Home