Belt, thermal detonator and everything else!
I had read in many places that after the helmet, the thermal detonator is the most difficult part to put toguether. I must say, it is.
The firt big problem, was that both of the main body parts were not circular enough. I mean, the did not form a cilindrical shape when placed toguether. So to soilve this, I used the hot air gun and some tape, to give them the correct shape. It was not very diffciult, but it takees some skill to do it. Most importanto of all is being patient both to heat the part and to let it cool down.
Onces it was done, it was all downhill.
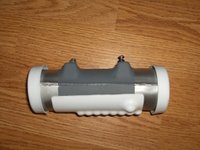
I pasted the main body parts toguether and then painted it in gray. This to paint the glue and hot glue I used toguether with the plastic. No problem. Then, I painted the edges in silver chrome, instead of using the stickers. Dont know if it looks better, buut it definetely doesnt look bad.
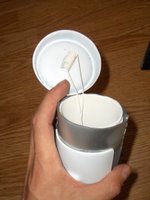
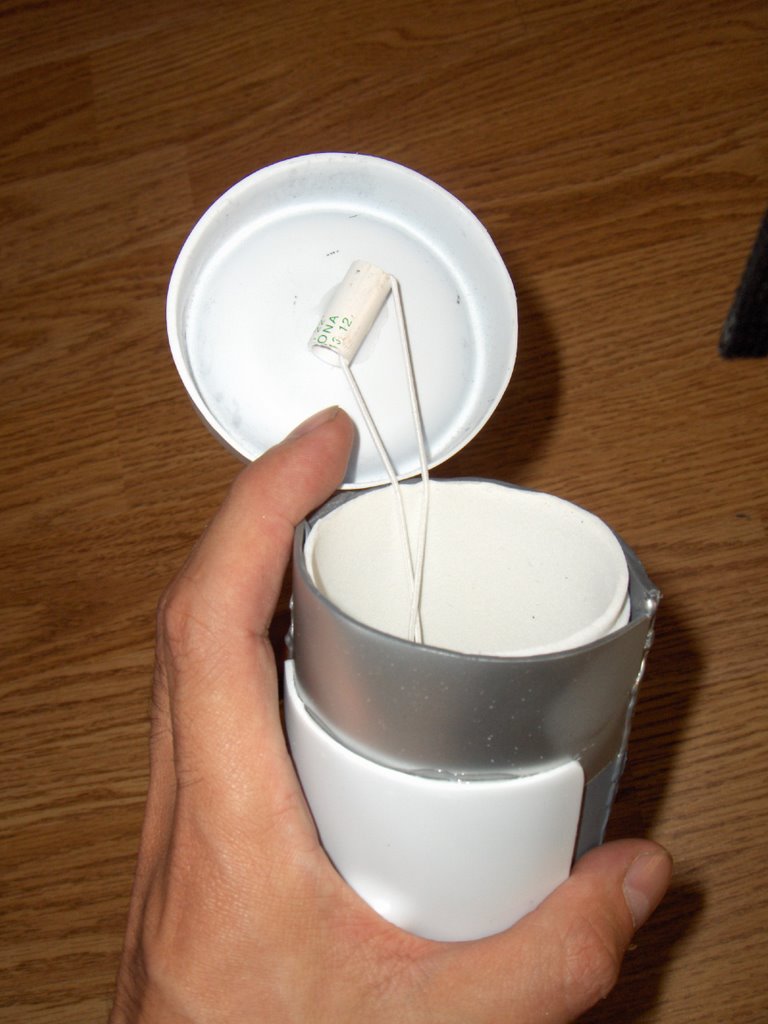
Then, I wanted to use the thermal detonator as a sort of storing device for keys or personal stuff. So before glueing the "lids", I glued part of a plastic pen, to tie some bungy cord, to allow me to open or close it. It worked fine. I did glued one of the lids, the other one is loose.
Once this was done, I just had to figure out how to attach it to the belt. I decided to screw it to the belt. And so I did. But before finishing it up, I needed the belt.
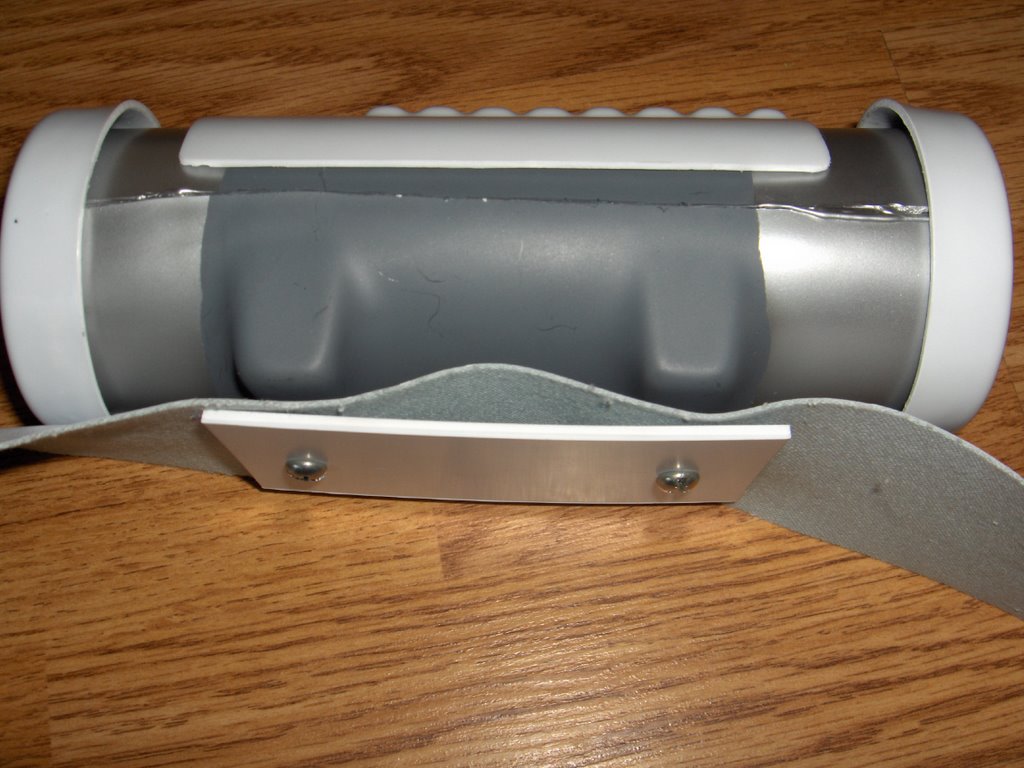
Instead of using the extra styrene pieces that I got with the kit to make the belt, I usd some white plastic fabric or something, to make a belt, and then attached the utility belt and the detonator to it. To do it, I fixed a piece of styren to the detonator screws and placing inbewtween them the belt. (sorry, my english is not at its best today). Here is a picture of it.

To attach the Styrene utility belt to the belt I used some styrene strips to make a kind of belt straps on the back side, and passed the belt under them. It was very tricky, but onced I had the correct glue, it was done nicely. And then the thermal detonator, the utility belt and the plastic belt were all one piece. I just used some IS velcro to make them attach firmly.
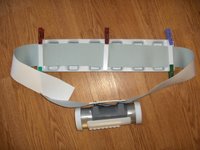
After placing th eblaster hoslter in place the belt is done!!
Next. Put it on!
The firt big problem, was that both of the main body parts were not circular enough. I mean, the did not form a cilindrical shape when placed toguether. So to soilve this, I used the hot air gun and some tape, to give them the correct shape. It was not very diffciult, but it takees some skill to do it. Most importanto of all is being patient both to heat the part and to let it cool down.
Onces it was done, it was all downhill.
I pasted the main body parts toguether and then painted it in gray. This to paint the glue and hot glue I used toguether with the plastic. No problem. Then, I painted the edges in silver chrome, instead of using the stickers. Dont know if it looks better, buut it definetely doesnt look bad.
Then, I wanted to use the thermal detonator as a sort of storing device for keys or personal stuff. So before glueing the "lids", I glued part of a plastic pen, to tie some bungy cord, to allow me to open or close it. It worked fine. I did glued one of the lids, the other one is loose.
Once this was done, I just had to figure out how to attach it to the belt. I decided to screw it to the belt. And so I did. But before finishing it up, I needed the belt.

Instead of using the extra styrene pieces that I got with the kit to make the belt, I usd some white plastic fabric or something, to make a belt, and then attached the utility belt and the detonator to it. To do it, I fixed a piece of styren to the detonator screws and placing inbewtween them the belt. (sorry, my english is not at its best today). Here is a picture of it.
To attach the Styrene utility belt to the belt I used some styrene strips to make a kind of belt straps on the back side, and passed the belt under them. It was very tricky, but onced I had the correct glue, it was done nicely. And then the thermal detonator, the utility belt and the plastic belt were all one piece. I just used some IS velcro to make them attach firmly.

After placing th eblaster hoslter in place the belt is done!!
Next. Put it on!
posted by plasta at 2:38 PM
![]()


1 Comments:
Good replies in return of this query with firm arguments and describing all regarding that.
My blog post : party girls
Post a Comment
<< Home